Configure Trigger Node
-
Search for Apex Home in n8n Nodes:
- Open n8n and navigate to the nodes section.
- Search for "Apex Home" in the available nodes.
- Click on the "Apex Home" node to add it to your workflow.
-
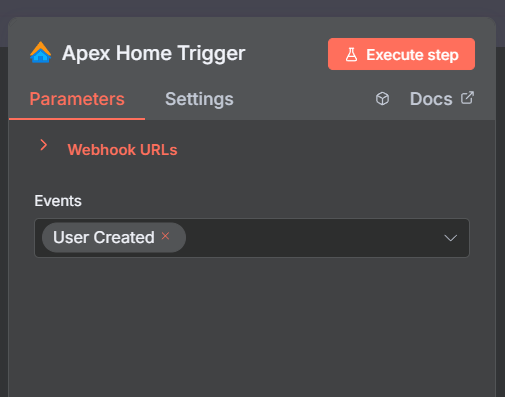
Choose a Trigger:
- Once the "Apex Home" node is added, you will see a list of 50+ triggers.
- Select the trigger that matches your requirement.
- This will open a configuration screen similar to the one shown below:
-
Copy the Webhook URL:
- In the configuration screen, locate the "Webhook URL" field.
- Click on the field to copy the webhook URL.
-
Set Up the Webhook in Apex Home:
- Use the copied webhook URL to configure the webhook in Apex Home.
- For testing purposes, use the test webhook URL.
- When the workflow is activated, ensure you use the production webhook URL.
-
Trigger Events:
- Once the webhook is set up, the Apex Trigger will start catching events from Apex Home.
Example Output of the Trigger
When an event is triggered, the output will look like the following:
[
  {
    "eventName": "test_event",
    "data": {
      "message": "This is a test webhook call."
    }
  }
]
- The
eventNamefield indicates the type of event that occurred. - The
dataobject contains additional information related to the event. The structure of thedataobject may vary depending on the trigger.
Full List of Triggers
For a comprehensive list of all available triggers, refer to the Full List of Triggers.
Taking Further Actions
- Based on the
eventName, you can define specific actions in your workflow. - Use the data provided in the
dataobject to customize your workflow logic.
By following these steps, you can successfully configure and utilize the Apex Home Trigger in n8n to automate your workflows.